

Stickers
How to prepare sticker artwork for print and cutting
By the PiCraft team · Updated
In short
Start with a transparent PNG at the physical size you will print, with a continuous outline the cutter can follow. For home cutting, upload as a Print Then Cut graphic in Cricut Design Space; for shop printing, confirm DPI and trim with your vendor. See sticker size for PiCraft export dimensions.
Make it with PiCraft
Sticker Maker
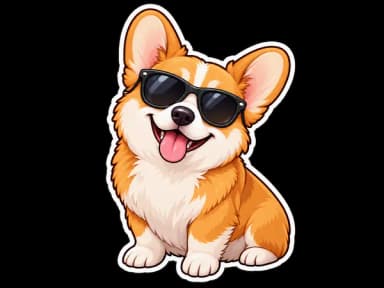
Die-cut sticker designs with a white border, exported as transparent PNGs.
What a print-ready sticker file needs
Stickers are small, but the file should be built at the size you plan to print. Resolution is pixels per inch: divide the pixel width by the width in inches to get PPI. A 900×900 px image printed at 3 inches wide is 300 PPI, which is a common target for crisp edges on desktop inkjet or laser prints.
Use a transparent PNG unless your printer asks for something else. Transparency tells the cutter or trim path where the sticker ends. A JPG fills empty areas with white and can create a rectangular box around the art.
PiCraft’s Sticker Maker exports a 2048×2048 px transparent PNG for editing and a 900×900 px file sized for a 3×3 inch sticker at 300 DPI, with a built-in white die-cut border around the art. It does not add a separate cut-line layer; the transparent edge is the cut path you configure in your machine or print software.
White border, die-cut edge, and what machines follow
Die-cut stickers are cut to the shape of the art. A white border just inside the outer edge is a practical buffer: if the blade or kiss-cut drifts slightly, you see a sliver of white instead of a notch in the illustration.
Professional shops may ask for a vector cut path or a spot-color kiss-cut line. Home workflows often rely on the visible outline of the printed image. PiCraft bakes the border into the artwork; you still set the cut in Design Space or your printer’s RIP.
Before a batch run, zoom in on the PNG over a dark background. A continuous white ring and no grey fringe around the subject mean the edge is ready. Regenerate if pale areas were lost when the background was removed.
- One subject per file keeps silhouettes readable at planner size.
- Short text (a few words) survives cutting and peeling better than long phrases.
- Place multiple PNGs on one sheet yourself; PiCraft delivers single designs, not a full press layout.
Uploading PNGs to Cricut Design Space
Cricut accepts PNG among its basic raster formats. During upload, the checkerboard areas are removed and will not cut; solid areas become your printable shape unless you edit further.
For full-color stickers you print on your home printer and then cut with the machine, choose the Flat Graphic upload type. Cricut describes this as a single-layer, full-color image for Print Then Cut projects.
If you only want a single-color vinyl cut with no printing, use the Single Layer path and clean up the background in the upload flow instead of Flat Graphic.
Cricut asks you to upload images you own or are authorized to use. That matters if you sell stickers: avoid trademarked characters, sports logos, and brand marks you do not control.
- In Design Space, open Upload and choose Upload Image.
- Select your PNG. For Print Then Cut, continue through the basic upload flow unless you need to erase leftover background.
- On the save step, pick Flat Graphic for printed color stickers, or Single Layer for cut-only vinyl.
- Name the image, upload it to your library, and place it on the canvas.
- Set the layer operation to Print Then Cut, size the sticker, then use Make to print and cut.
Cricut’s help article on uploading images walks through the same flow on desktop and mobile.
Print Then Cut basics and page limits
Print Then Cut prints registration marks around your design so the cutter can align the blade. Part of each sheet is reserved for those marks, so the maximum cuttable area is smaller than the paper size and depends on your Cricut model and the page size you select in Design Space.
A 3×3 inch sticker fits comfortably on letter-sized sticker paper with room for several copies. If Design Space shows a warning that the image is too large, use Auto-Resize or change the Print Then Cut page size to match the paper in your printer.
Cricut recommends white material for Print Then Cut on Explore machines; Maker machines can handle light to medium colored papers. Use the mat type suggested for your material—LightGrip is common for standard sticker paper.
Design Space can add a small bleed around Print Then Cut images for more accurate cutting. Preview the cut path before you load the mat.
Paper stickers vs vinyl
Matte or glossy sticker paper is inexpensive and fine for planners, packaging seals, and party favors. It scuffs when wet and is not durable on outdoor gear.
Printable vinyl, often with a laminate top coat, handles water and handling better. It costs more and may need different printer settings, but it is the usual choice for water bottles and outdoor use.
Kiss-cut sheets from online printers are another path: you upload art, they print and cut on a backing sheet. Send the transparent PNG at the size and PPI they specify; many shops mirror the same white-border logic PiCraft uses.
Test one sticker before you print dozens
Print a single copy at 100% scale—no "fit to page" shrinking. Hold it against the surface where it will live. Check text spelling, line weight, and whether the border looks even after cutting.
On Cricut, run one Print Then Cut sticker and inspect registration. If the blade cuts inside the art, shrink the design slightly or confirm you saved the upload as Flat Graphic with the intended outline.
For Etsy, Redbubble, or craft fair inventory, keep a labeled test print in your project folder. It is cheaper than reprinting a full sheet after one wrong word.
When you need a starting file with transparency and a border already handled, generate art in the Sticker Maker and compare exports against the sticker size guide before you lay out a sheet.
Selling stickers: originals and trademarks
Marketplaces enforce intellectual property rules strictly. Describe original characters and phrases instead of copying TV, game, or brand assets you do not own.
Your listing photos can show the printed sticker, but the downloadable file should be your art only. If you use PiCraft for concepts, proofread text and verify the edge on a dark background before you list.
For party invites that match a sticker pack, you can align themes with the birthday invitation maker while keeping sticker and invite as separate print jobs.
Frequently asked questions
Does PiCraft include a separate cut line file?+
No. The PNG is flat artwork with a white border; the transparent outer edge is what you trace in Print Then Cut or hand to a printer. Cut lines are set in your machine or shop software.
What file size should I use for a 3 inch sticker?+
PiCraft provides a 900×900 px PNG at 300 DPI for a 3×3 inch print. You can also scale the larger 2048×2048 px master if your layout software needs extra pixels.
Why choose Flat Graphic when uploading to Cricut?+
Flat Graphic keeps full color for Print Then Cut. Single Layer is for cut-only vinyl silhouettes without printing the art on your home printer.
Can I print stickers on regular copy paper first?+
Yes. A plain-paper test checks size, spelling, and contrast before you use sticker paper or vinyl.
Sources
Platforms change their requirements, so check the official page before you submit a file.
Ready to make one?
Sticker Maker
Die-cut sticker designs with a white border, exported as transparent PNGs.
Related guides
Makers that help
Sticker Maker
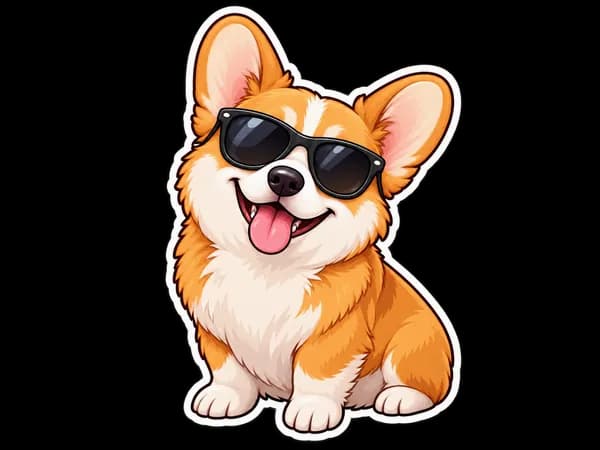
Die-cut sticker designs with a white border, exported as transparent PNGs.
T-Shirt Design Maker
Print-on-demand t-shirt graphics as transparent 4500×5400 PNGs.
Birthday Invitation Maker
Themed birthday invitations for kids and adults, printable at 5×7 or shareable by text.